Managing multiple Facebook pages might seem daunting. But with the right tools, tips, and systems, the process is actually quite easy.
You might be a digital marketer in charge of several brands’ social media accounts.
Or you might be an entrepreneur whose business has multiple locations (e.g. franchised restaurants).
Or you might just love managing Facebook pages because you’re a social media loving nerd like the rest of us.
Whatever the case, we have tips to help you manage multiple Facebook pages effortlessly.
How to manage multiple Facebook pages
As of 2019, Facebook allows anyone with a Facebook account to manage as many pages as they want.
So if you’re a digital marketer in charge of multiple brands, it can easily get out of hand.
Luckily, there are two great systems to help manage the pages:
- Hootsuite. Our social media management platform used by more than 16 million marketers and social media managers.
- Facebook Business Manager. Facebook’s tool to help you manage pages and ad accounts.
Let’s take a look at how they work now.
How to manage multiple Facebook pages with Hootsuite
Before you start, you need two things:
- A Hootsuite account in order to access the dashboard. Create a free account here.
- Multiple Facebook pages you want to manage. Learn how to create Facebook business pages here.
Then move onto the first step.
Step 1: Add social networks
After creating an account, get to your Hootsuite dashboard. It should look like this:

Click on Get Started under “Browse all Streams.” It will take you to the area where you can connect your social media networks.
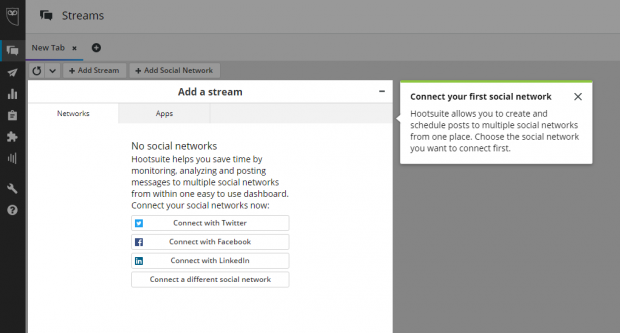
Click on Connect with Facebook for now. You can always add more networks later.
A window will pop up where you can connect with the Facebook account you want linked with your Hootsuite dashboard.
Step 2: Connect a Facebook page
At this point, you can also choose which pages you want to manage.
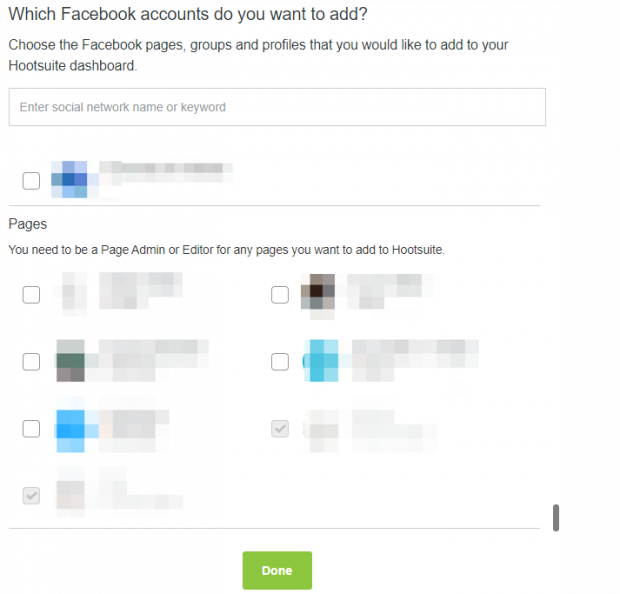
Link the Facebook pages you’d like to appear on your dashboard.
Currently, you can add an unlimited number of Facebook Pages to your dashboard with a Hootsuite Enterprise account. For other plans, you can add as many Facebook Pages as you are allowed social profiles.
Note: You will only be able to add Facebook Pages of which you are the Page Admin or Editor. Once you do that, you’ll be able to add the Facebook pages to different tabs and streams—which brings us to …
Step 3: Add a stream
From your dashboard, click on Add Tab.
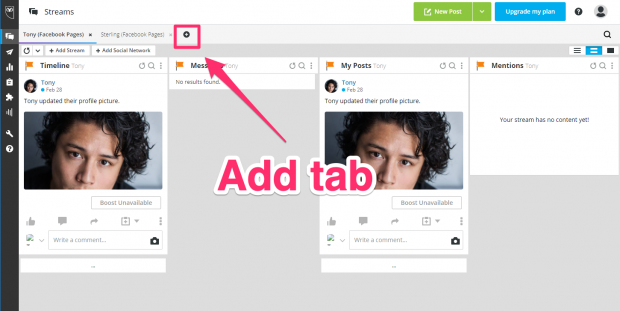
From here, you’ll be able to add streams, which are all the different types of content from your page such as messages, posts, and mentions.
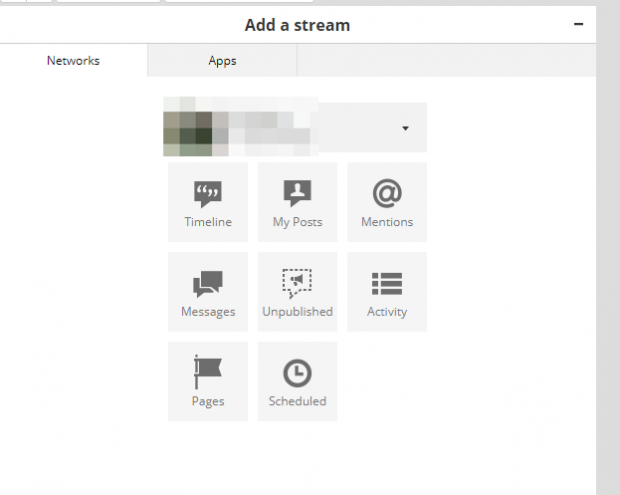
Choose the content you want to see from your page. Once you do, they’ll appear on your tab.
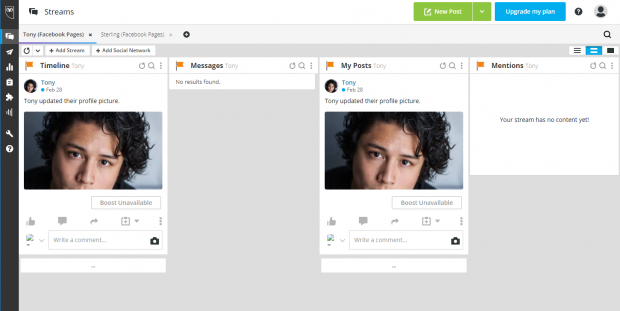
You can add content from different pages onto a single tab. For example, you can create a tab containing all the timelines for your Facebook pages.
Or you can create multiple different tabs dedicated to your individual Facebook pages. For example, if you manage different brands, you might want to keep all their page content separate.
Once you create the tabs you want, congrats! You just learned how to manage multiple Facebook pages via Hootsuite!
From your Hootsuite dashboard, you can now write comments, reply to comments, like posts, and boost posts to reach more people—just to name a few options.
How to manage multiple Facebook posts from Facebook Business Manager
Facebook Business Manager allows you and your team to manage multiple Facebook pages while giving you a centralized place to manage all of your Facebook-related marketing projects.
With it, you’ll also be able to give multiple users access to things like your business’s Instagram account and product catalogs. Think of it as the one-stop shop for your Facebook marketing and advertising needs.
If you like more in-depth access into Facebook analytics and more control over your ads on the platform, Facebook Business Manager is a good choice.
If you want to easily post on your pages, respond to followers, and keep all your social media accounts (not just Facebook) in one dashboard, a social media management platform like Hootsuite is your best bet.
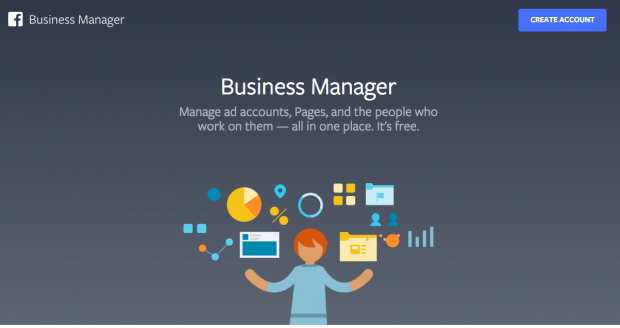
Step 1: Create a Facebook Business Manager account
Go to business.Facebook.com and click on Create Account.
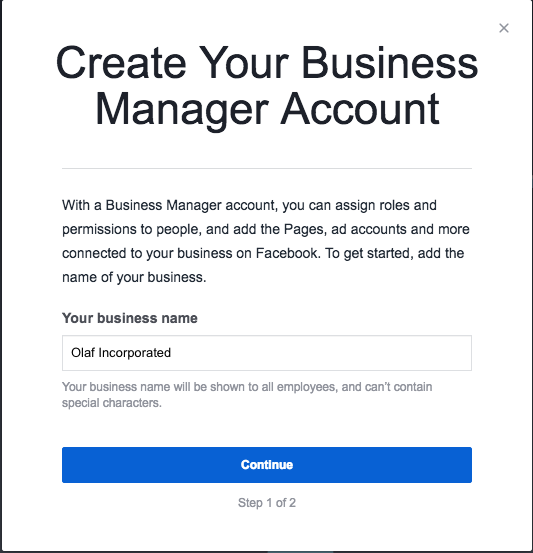
Enter your business name in the next window, then click Continue.
Enter your name and email associated with your business. Then click Finish.
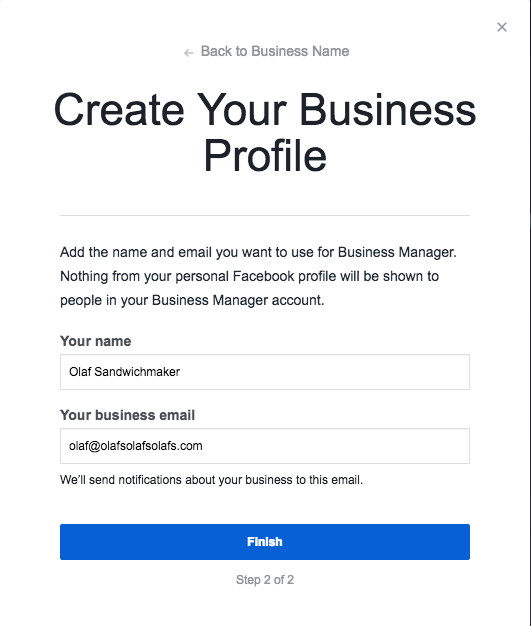
You have created a Facebook Business Profile. Congrats!
Now it’s time to move onto the next step…
Step 2: Add your Facebook Business pages
To request access to a page, go to your Facebook Business Manager dashboard. Click on the settings icon in the top right corner.

Go to Accounts on the left hand side bar. Then click Pages below it.
Then click + Add.

You’ll now have three options:
- Add a page. If you already run a Facebook page on the email you used to register, you simply add it to your Facebook Business Manager.
- Request access to a page. If you’re managing a different business’s Facebook page, you will have to request access from that page’s admin.
- Create a new page. This requires you to create a page in your regular Facebook account.
To Add a page, click on the button and this window appears.
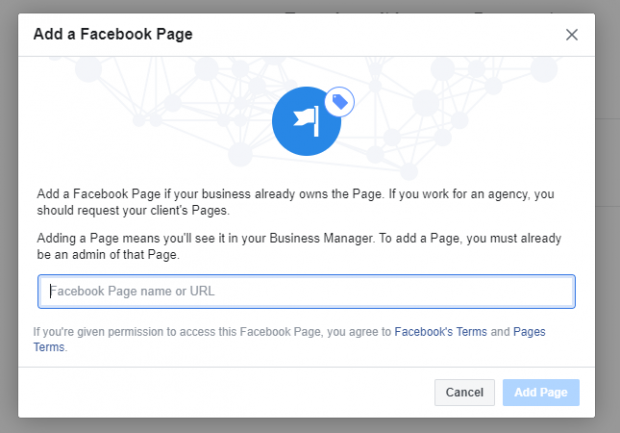
Type in the Facebook page you want to add. Then click Add Page.
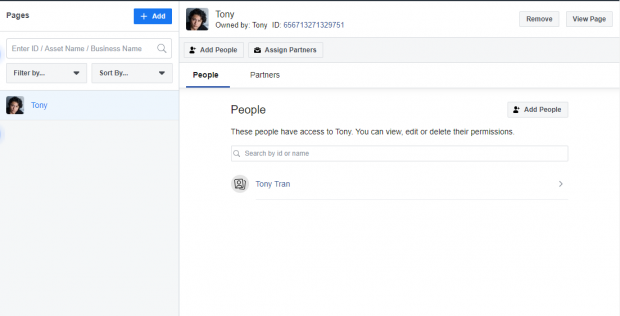
If you’re already the page admin, your request will be automatically approved. The page now appears in you dashboard.
To Request access to a page, click on that button. A window pops up where you need to choose your primary page. This is the page that is used to verify you.
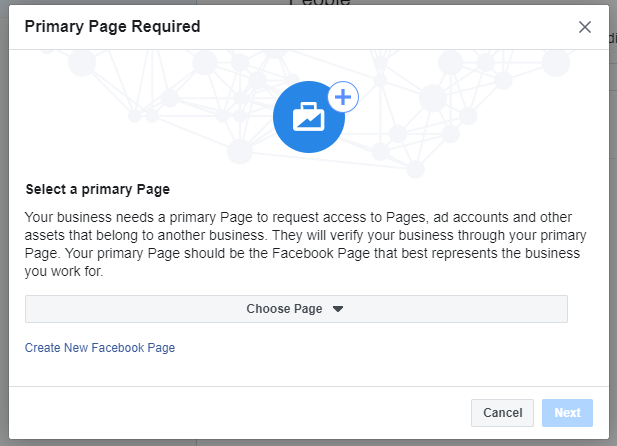
Once you choose one, click Next.
Another window pops up where you can type the name or URL of the page you want access to. When you type it in, you’ll then be able to toggle the levels of access you want.
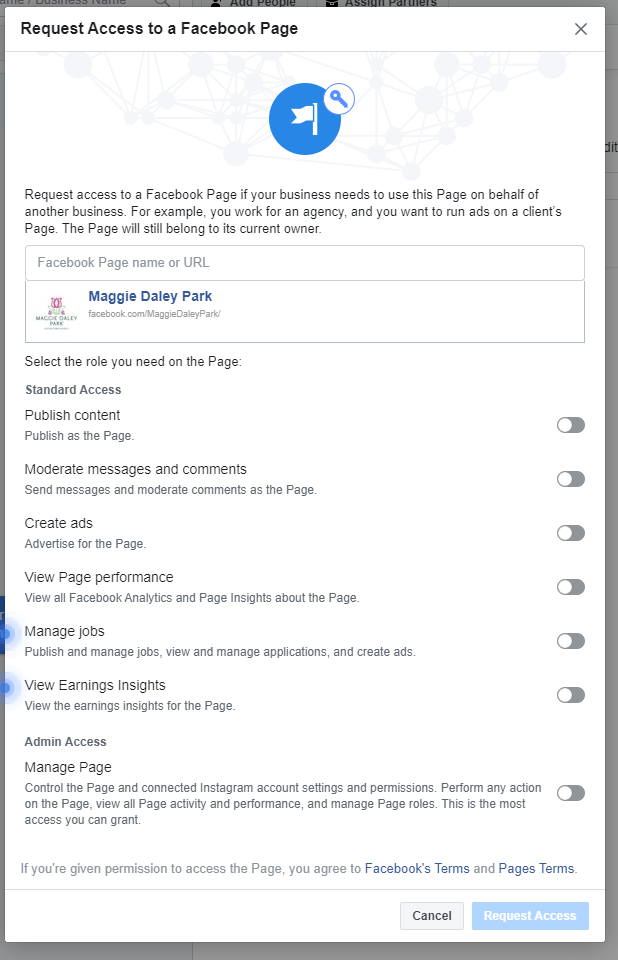
Choose the level of access you want using the toggles on the right. Then click Request Access.
Once your request is approved, the page appears on your dashboard.
Bonus: Download a free guide that teaches you how to turn Facebook traffic into sales in four simple steps using Hootsuite.
To Create a New Page, click on that button. A window appears where you can choose your page’s category.
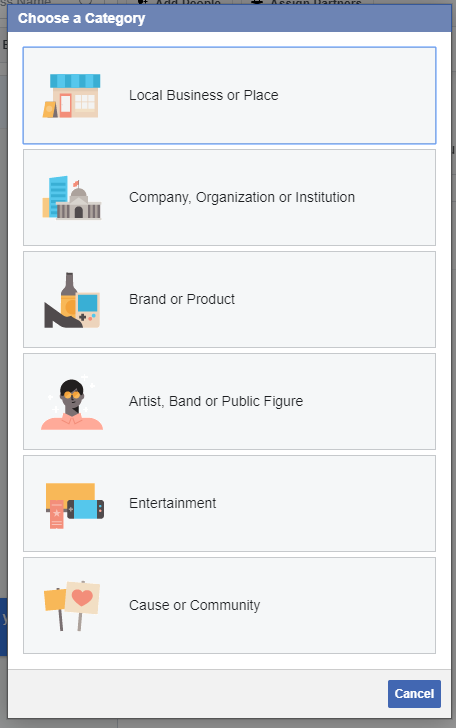
For our intents and purposes, we’re going to go with Local Business or Place. Click on it and another window appears where you can enter basic information about your business.
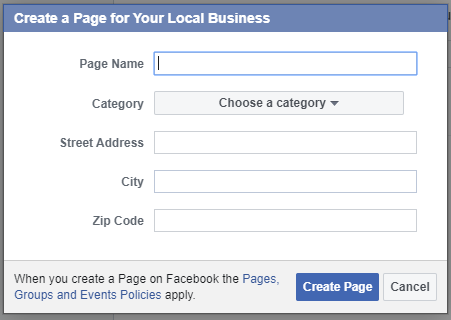
At minimum, you need to enter your page name, category, and city.
Then click Create Page. The page now appears on your dashboard.
Do this to add as many Facebook pages as you’d like.
If you have a business with multiple store locations—and you’d like a great way to keep them all consistent with posts—move onto step 3…
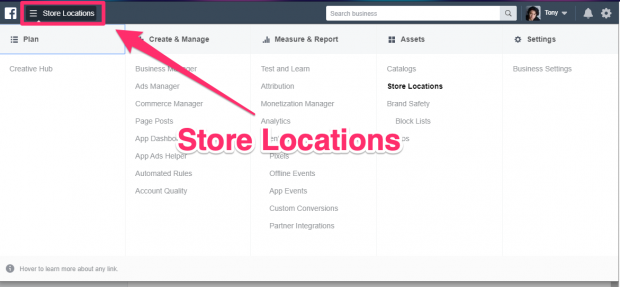
Step 3: Add store locations
Go to the hamburger menu on the top left and click on Store Locations.
Click Get Started in the “Promote Your Stores” window.
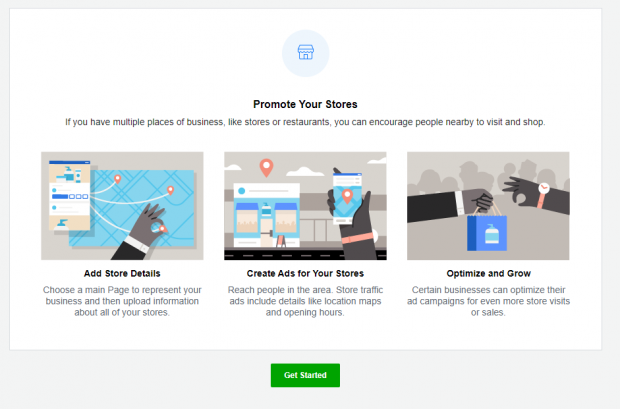
Now, you’ll set up your main store page. This is the “parent” page for all of your other store location pages. Whatever gets posted here will be reflected in the other location pages.
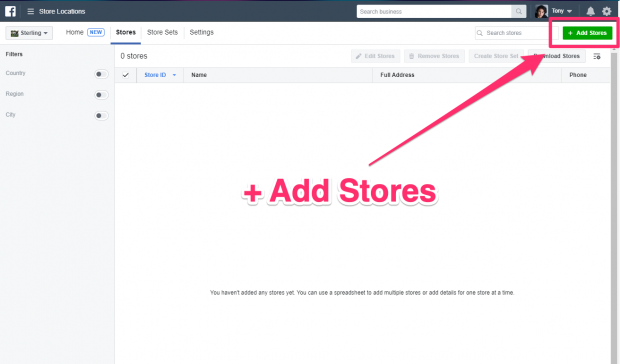
Once you choose a main page, you have the option to add other stores. Simply to the dashboard for your store page, and click + Add Store in the top right.
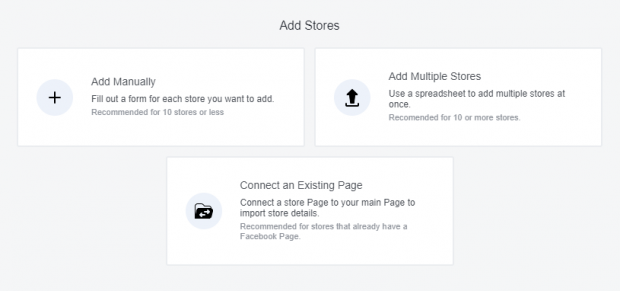
You have three options:
- Add Manually. Fill in your store information one at a time.
- Add Multiple Stores. Upload a spreadsheet of all of your store information to save time. Download an easy-to-follow template from Facebook.
- Connect an Existing Page. If your stores already have pages, connect them to the main page.
Remember: Anything you post on the main page appears on your other location pages.
For example, if you own a chain of coffee shops and you post about the new pumpkin spice lattes you’re releasing on your main page, that post appears on your other location pages as well.
You can change this by going to your Settings and then Locations. Facebook gives you the following options for your location settings:
- Show posts from main page on each location page that doesn’t have their own posts (This is the default).
- Never show posts from main page.
- Always show posts from main page on location pages.
Choose the setting that’s right for you.
And there you have it! You can now use the Facebook Business Manager dashboard to manage multiple Facebook pages.
For more, head on over to our article on how to use Facebook Business Manager. In it, you’ll learn the systems to create ads, connect your Instagram, connect your business partners, and track leads and conversions.
3 tips for managing multiple Facebook pages
Now you know some great tools to help you get a handle on your Facebook pages. Let’s take a look at some of the best pieces of advice we have to get the most out of your experience.
1. Create a social media content calendar
A social media content calendar is a digital marketer’s best friend. It takes the guesswork out of what you’re going to post each day because you’ve already decided that what you’re going to post.
It will also help you get a great mix of content in each day. That way you can avoid overmarketing your own business, and provide more interesting content for your readers.
Though your ideal content mix is specific to your brand, the rule of thirds can help you get started:
- ⅓ of your content promotes your business
- ⅓ of your content comes from sources related to your industry
- ⅓ of your content engages your followers (e.g. responding to comments, liking their comments)
When you’re managing multiple Facebook business pages at once, you’re going to fall in love with your content calendar. Create separate columns for separate Facebook pages and specify which content gets published where.
For more on this, check out our article on how to create a social media content calendar.
2. Share evergreen content
Did you know there’s a way to practically never run out of content ideas?
How? Simple: Evergreen content.
Evergreen content refers to the topics and content that you can always share with your reader at almost any time of the year.
A good example comes from Men’s Health and how they always put out different articles on how to get six-pack abs in every issue.
You likely have tons of evergreen content available already. Think about the topics in your industry that will always be popular.
Are you in fitness? People always want to know ways to lose weight.
Are you in the restaurant business? Share timeless recipes you know your audience loves.
Are you in personal finance? There are always going to be people looking to get out of deb —and you can help them!
For more on this, check out our article on how to repurpose content. It’ll show you how to take articles that you’ve already published and get the most life out of them on social media.
3. Use an eye-catching call to action
Facebook allows you to create a call to action (CTA) button at the top of your business pages. This allows you to get more leads, and thus more sales.
And there are plenty of different CTA buttons to choose from:
- Donate Now. Solicit donations from your users.
- Book Now. Let your users book your services.
- Contact Us. Allows your users to directly contact you for questions or requests.
- Use App. If you have an app, your users can download and use the app from your Facebook page.
- Play Game. If you offer a game, users can play the game from your Facebook page.
- Shop Now. Allows users to shop for your products. Perfect for if you have an e-commerce store.
- Sign Up. Collect leads from your user by having them sign up for a newsletter or other service.
- Watch Video. Have a video you want your user to watch? This button is a perfect CTA for them.
To change your CTA, hover your mouse over the Send message button and click Edit.
Manage multiple Facebook pages alongside your other social channels and save time using Hootsuite. Schedule posts, share video, engage with followers, and measure the impact of your efforts. Try it free today.
