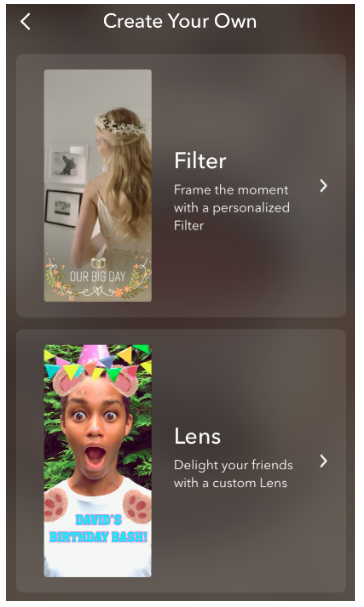
You can create a Snapchat lens or filter from your phone or computer. In this guide we’ll walk you through each process separately.
Bonus: Download a free guide that reveals how to increase social media engagement with better audience research, sharper customer targeting, and Hootsuite’s easy-to-use social media software.
How to create a custom Snapchat filter from your computer
To get started, visit Snapchat’s desktop page on custom filters and lenses. Click on Create Filter.
Step 1: Design
Choose whether you want to design your own filter or upload an existing one.
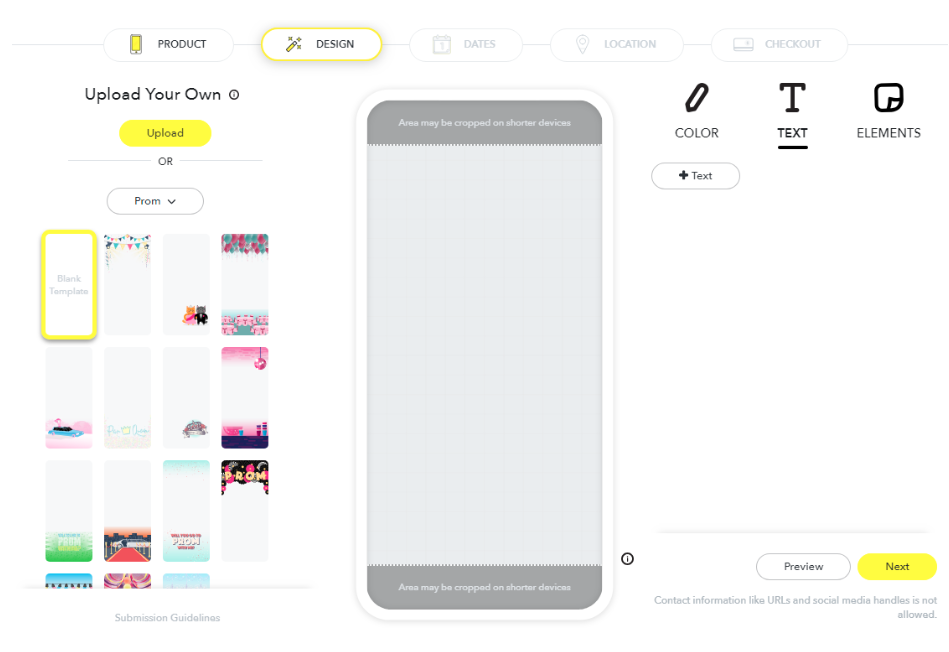

You can also choose from templates for events like Prom, weddings, and birthdays. These designs are easily customizable.
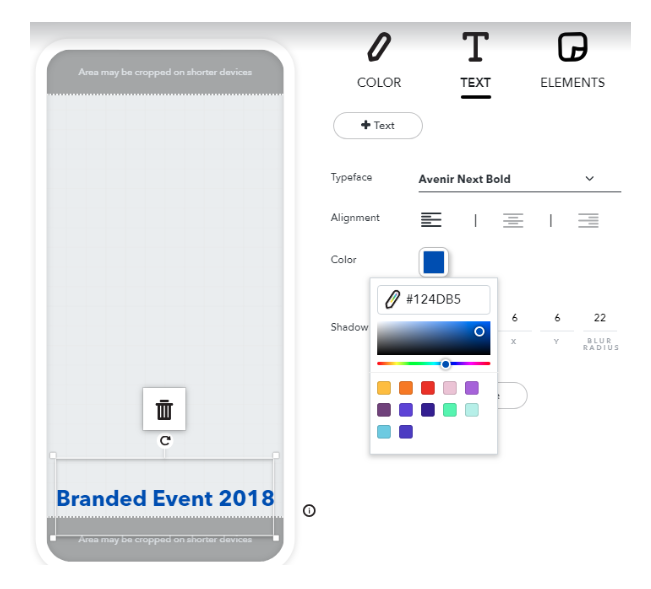
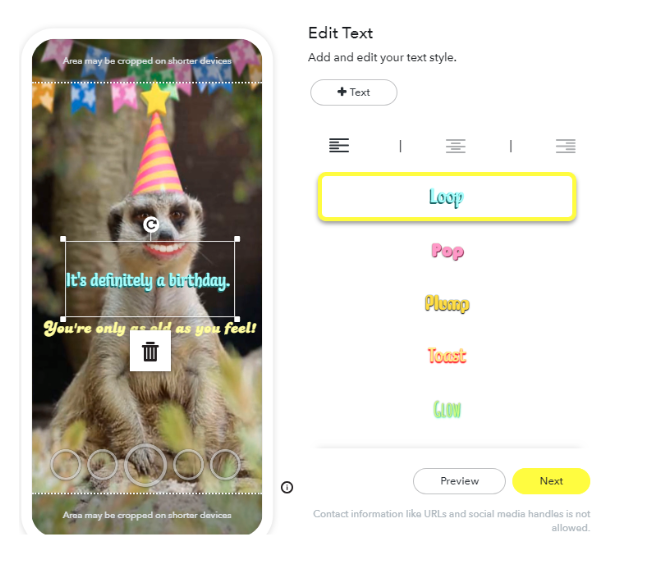
One of the main things you can do here is add text, change color, shadowing, size, and placement.

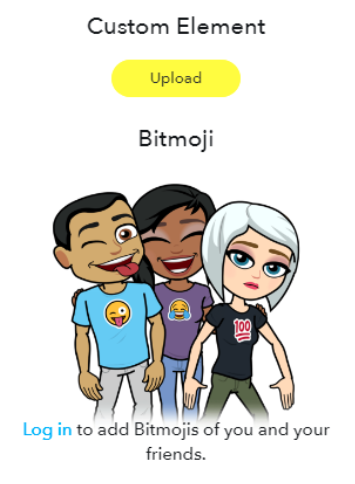
You can also add in Bitmoji and other graphic elements:

If you’re creating a filter from scratch, you can use a design tool like Canva and upload it when you’re finished. Canva is particularly useful because it has preset dimensions specifically for Snapchat filters.
If you’re going on your own, pay close attention to the submission guidelines.
- You can’t use logos or trademarks without authorization.
- Don’t include offensive content.
- Your final submission should be under 300 KB in a PNG format, with a transparent background.
- It should also be either 1080 x 1920px or 1080 x 2340px.
Once you upload your custom design, you’ll be able to use the preview tool to see how it looks on a device. Make sure to preview your work before moving on.
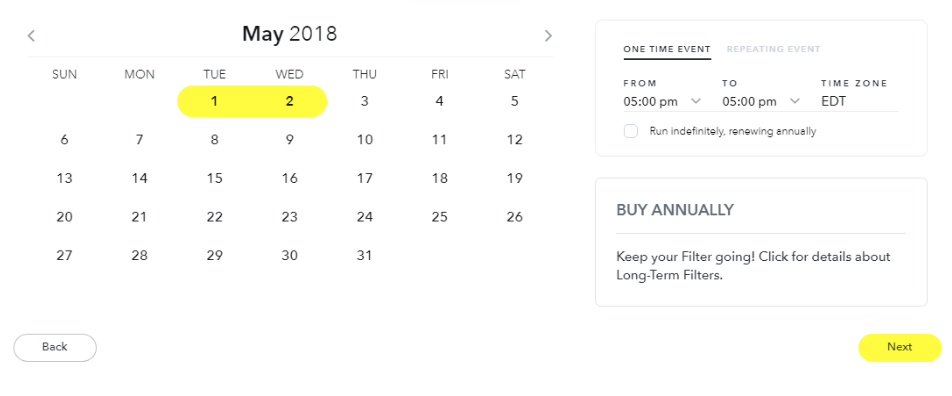
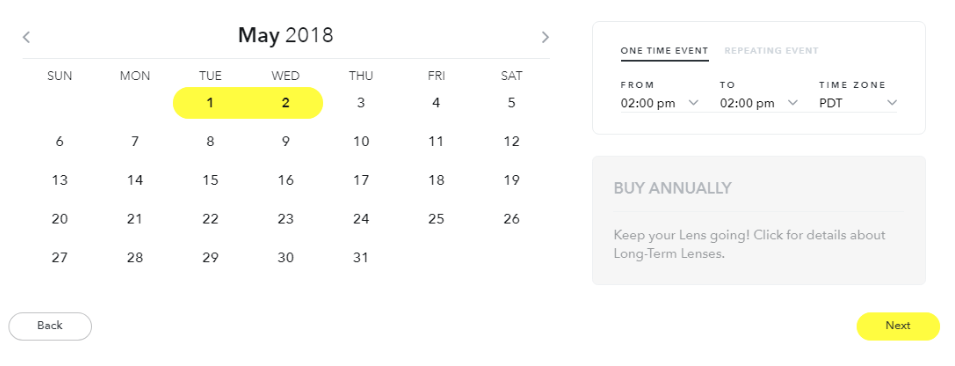
Step 2: Dates
Next, determine when your filter will be available for users to access. You can choose to make it for a single event, spanning at least one day, for a period of time you specifically choose, or you could make it a repeating event (such as turning it on every Sunday, or once a month). If this is for an annual event, you can even set up a recurring annual filter, so it renews every year.

Step 3: Location
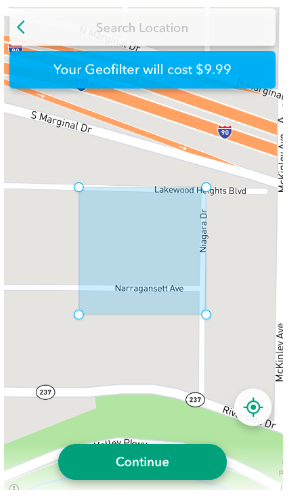
Once you’ve chosen a date and time range, you’ll be able to define the physical borders of your custom Snapchat filter. You can either choose a specific address by searching for it, or draw an imaginary “fence” around the area you want the filter to be accessible.
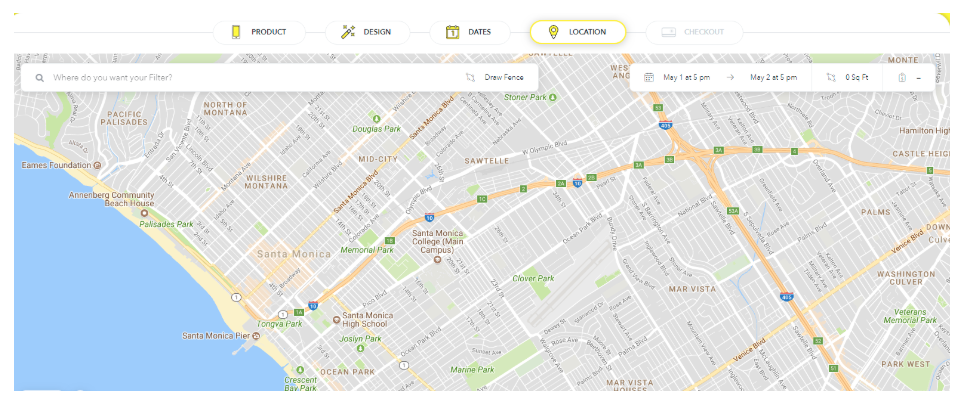

Note that your “fence” can be drawn to cover an area between 20,000 and 50,000,000 square feet. You can also redraw your fence as many times as you like. In the upper-right hand corner, you’ll notice the price of your custom Snapchat filter will change based on the size of your target area.


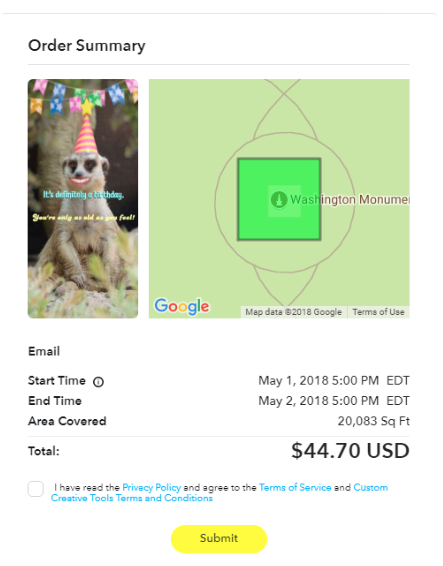
Step 4: Checkout
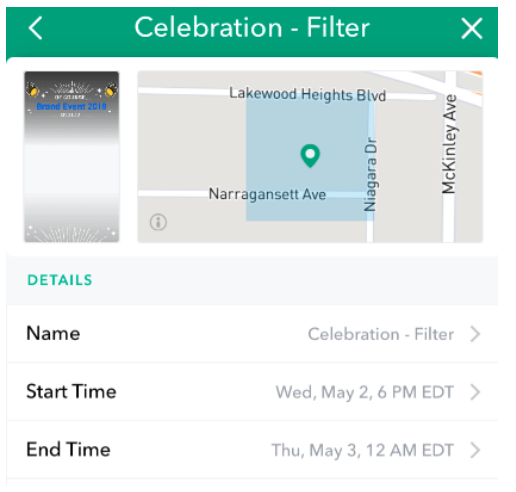
Once you’ve chosen the area for your filter, you’ll get a short recap page that explains exactly what you’re purchasing. This will show you the area you’re targeting, a preview of the filter, the date and time it will be available, and the cost.
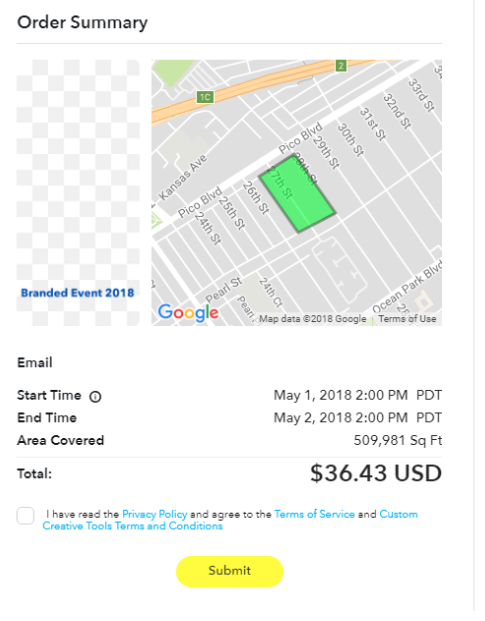

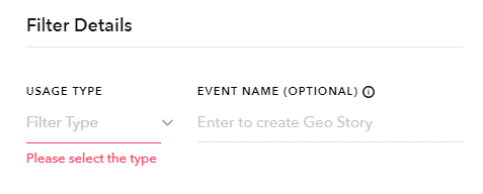
But before you check out, there’s one more thing you’ll have to do: choose whether this is for personal or business purposes.

After you’ve paid for the order, Snapchat will need to review your filter to make sure it meets the submission guidelines. Generally, this process takes a day or two. If your content is found to be unacceptable in any way, you’ll receive a written reason for the rejection, and you’ll have a chance to resubmit.
How to create a custom Snapchat lens from your computer
To get started, visit Snapchat’s desktop page on custom filters and lenses. Click on Create Lens.
You’ll notice that the process is very similar, so for steps two through four, you may refer to the “How to Create custom Snapchat filters from your computer” section above for more details if you need them.
Step 1: Design
You’ll notice there are significantly fewer options for Snapchat lenses than there are for custom Snapchat filters.


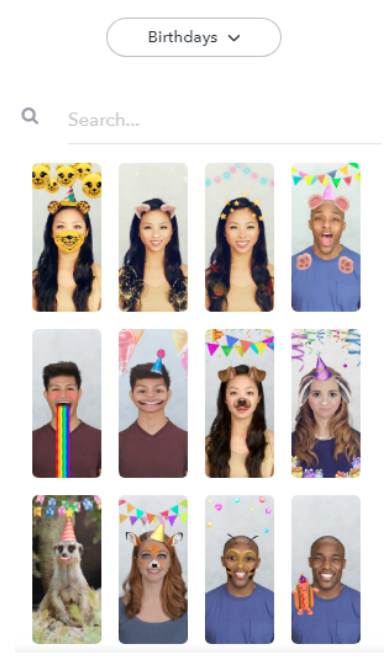
On the left, you’ll be able to choose from at least six different options, which vary depending on the season. These, for example, are specifically “Birthday” lenses:

The next step is to add text. Add as much as you want, place it where you want, and choose from several font and color options.

Make sure to preview your work before moving on.
Step 2: Dates
Once your design is ready, choose when it will be available, or set it to repeat at regular intervals.

Step 3: Location
When you’ve selected the date range, you can move on to the location. Here, you can select a specific address or destination, or draw your own “fence.” The cost of your order will increase with the size of the area. 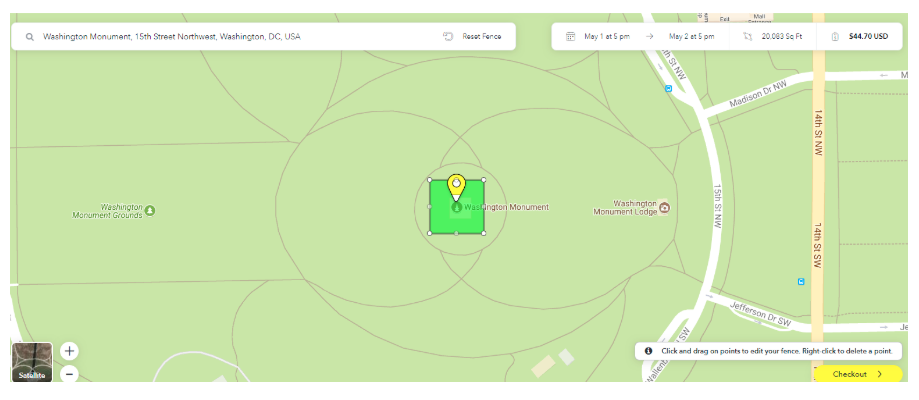

Step 4: Checkout
You’ll get the chance to review your order before it’s final:

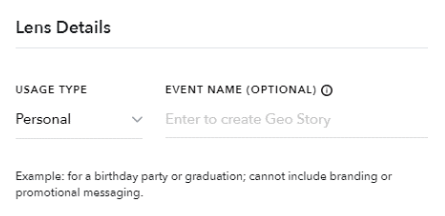
And when you submit, you’ll need to select whether the lens is for personal or business purposes. The submission guidelines (linked above) vary depending on how you’re using your custom lenses.

How to create a custom Snapchat filter from your phone
You can also design a custom Snapchat filter on your phone. The advantage here is that you can do it all within the Snapchat app. The only thing you can’t do is upload a custom filter that was designed outside of the app.
Step 1: Design
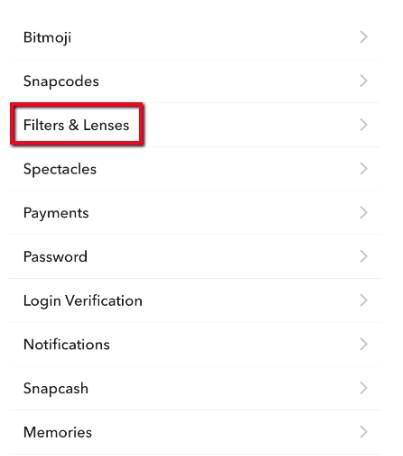
Start in the app’s settings menu, and look for the “Filters and Lenses” option.

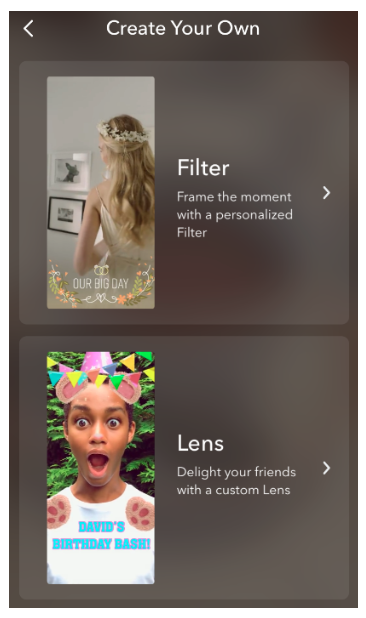
From there, select Filter.

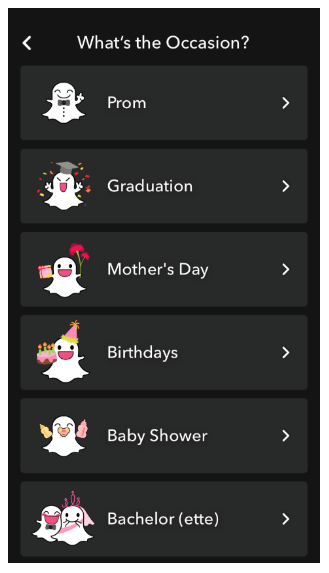
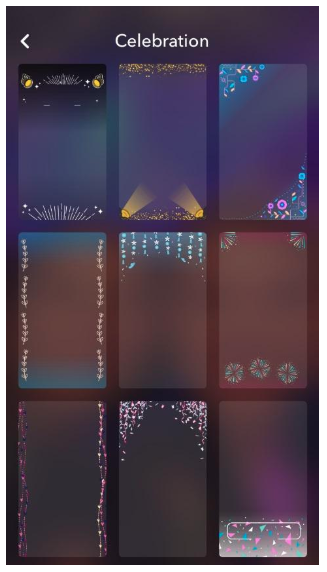
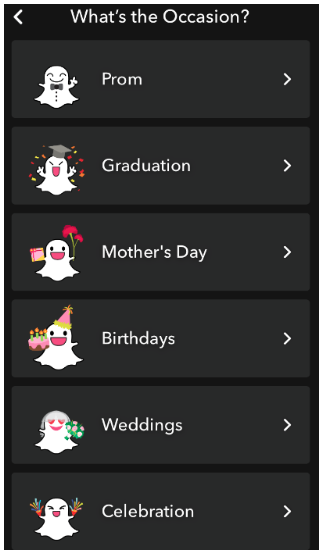
Now choose a specific occasion that you’re creating the custom Snapchat geofilter for:


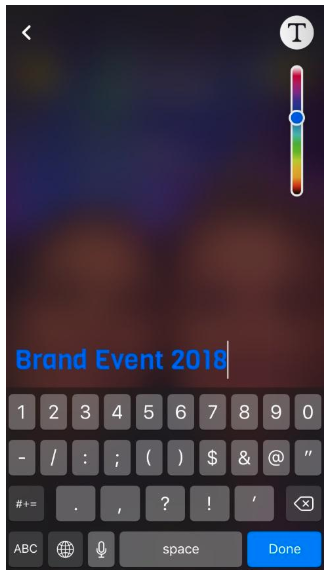
Now add text.

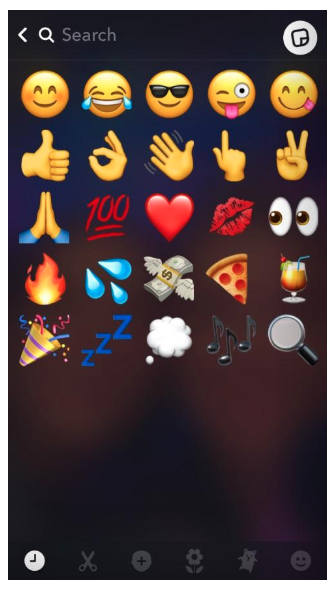
When creating a geofilter on your phone you can easily add emoji, Bitmoji, and other icons.
Bonus: Download a free guide that reveals how to increase social media engagement with better audience research, sharper customer targeting, and Hootsuite’s easy-to-use social media software.

When you’re done, move on to selecting a date.
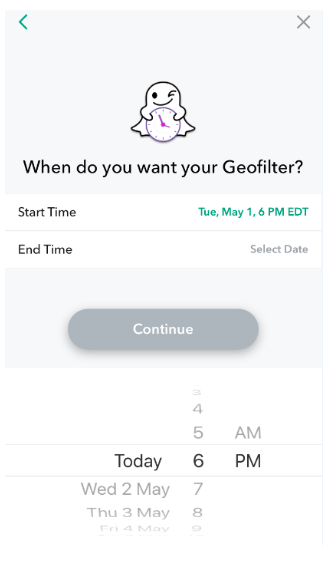
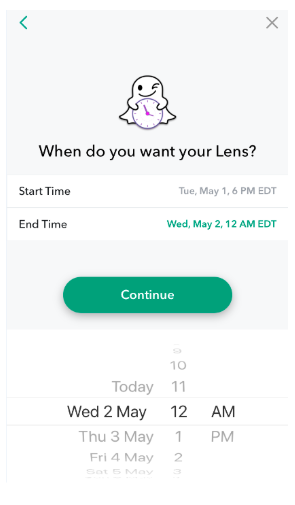
Step 2: Dates
The interface here is fairly straightforward. Your geofilter will be active from a specific start time to a specific end time.

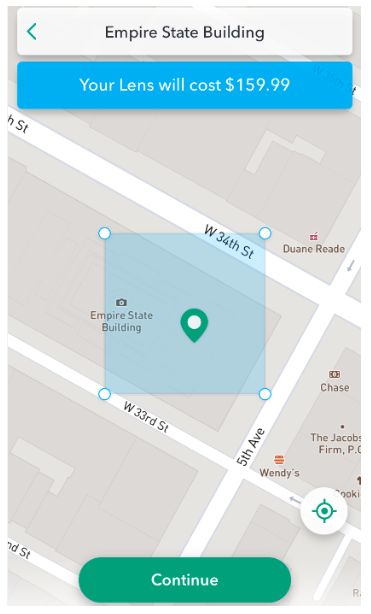
Step 3: Location
When that’s in place, you can select a specific location for your geofilter to be active. By default, your app will detect your location and offer a suggested area around it, but you can customize this by setting your own parameters or choosing a specific address.

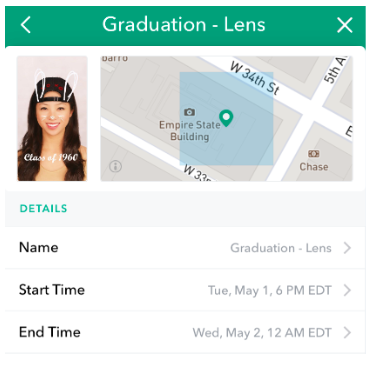
Step 4: Checkout
Finally, you’ll get a summary screen that includes the cost of your custom Snapchat filter, at which point you can finalize it or go back for more edits.

How to create a custom Snapchat lens from your computer
Step 1: Design
Start in the app’s settings menu, and look for the “Filters & Lenses” option.


From there, select Lens.

Now choose the type of event you’d like a filter for (or you can browse all the options at once).

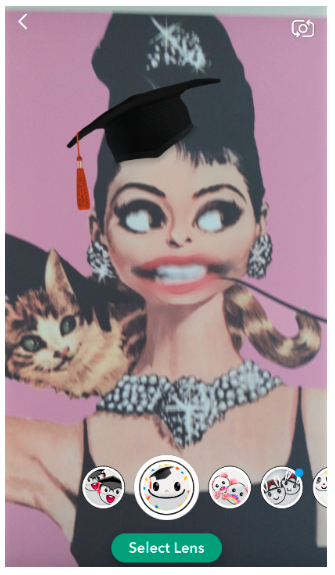
Now you’ll get to play around with different “base” lenses along the bottom of the screen, applying them with your camera to any face in your area:


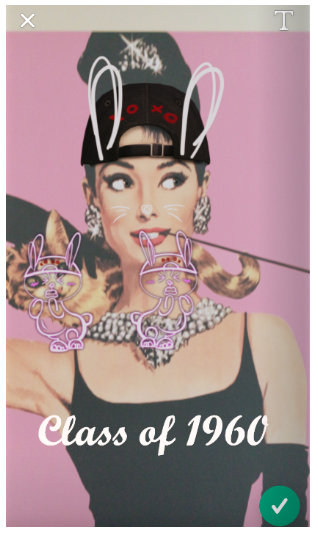
Using the T icon in the upper-right, you can add and customize your own text:

Step 2: Dates
Choosing a date is straightforward and works the way you think. Just set a start time and end time using the app.

Step 3: Location
When that’s in place, you can select a specific location for your lens to be active. By default, your app will detect your location and offer a suggested area around it, but you can customize this by setting your own parameters or choosing a specific address.

Step 4: Checkout
And once again, you’ll have a chance to review everything before you finalize your purchase. It’s your last chance to make edits before your filter is processed for review.

What happens next? Snapchat reviews your submitted lens or filter
Snapchat will review your submission to make sure it meets its guidelines. These are relaxed and forgiving, and are mostly in place to ensure a high standard of quality with no legal or reputation issues to jeopardize the image of custom filters.
For example, personal Snapchat geofilters may not have any references to logos, business names, or trademarks. Neither business nor personal filters or lenses may use personal photographs, phone numbers, emails, URLs, social media handles, or any content related to drugs or gambling. These rules aren’t too restrictive, and should fall in line with common sense for what’s considered offensive or dangerous content.
You’ll receive a notification when your submission is approved. From there, your custom lens or filter will be saved for future if you want to reuse it or build off the design.
And there you have it! You now have the power to exercise your creativity and start using Snapchat to promote your business or event—the perfect addition to your Snapchat marketing strategy. Come up with something original, and make your next event unforgettable!
Bonus: Download a free guide that reveals how to increase social media engagement with better audience research, sharper customer targeting, and Hootsuite’s easy-to-use social media software.

